|
Winter, 2006/2007 - It is now Jan. of
2007. So many things have taken my time this year and left so little
for this project.
Spring 2008. Has it been that
long? Yikes. My other
hobby has been consuming most of my time.
I actually got the garage cleaned out and
put the car outside. The VFR has been dusted off and ridden a few
times. Thankfully, after a long winter I still fit in my
leather. Barely...
Today I was on a mission. With
great thanks to Butch, I made some progress.
Courtesy of Butch:
Hi Damon,
So you won’t feel too bad I did exactly the same
thing you did! I’m 63 and have been working
on motors all my life as a hobby and I have to say this the toughest
I’ve done and I’m not interested in doing another. Problem
for me is these 160 motors are small to start with and
the parts are even smaller! Not much room to work and
hard to see what is going on. Add big hands and
old eyes and you’ve got frustration. Let me
tell you how I kept it from happening a second time.
I finally realized
that it was too easy to get things stuck with all of the trying to get
BOTH pistons in the cylinders at the same time
with them being able to rock on their pins as you were working on them. It
was easy to think the piston ring was maybe
binding when in actuality the other piston
hung on something. I had some time to contemplate what to do while I was
waiting delivery of the second set of rings ($50.00 out the window!). What
I did worked and I didn’t have to buy any tools.
The ring compressors suggested in some responses
would be a handy addition but you have to ask how many times you’d use
it. What is important with this method is to
make certain the entry chamfer on the cylinders is smooth and actually
helps the rings compress rather than giving an
angle where the rings can hang up. You can do
this with sandpaper, a file or Dremel rig. Anyway,
here’s what I did.
Basically I decided to let the weight of the cylinder
be the ONLY force I was using to put the pistons in the bores. To do this
I had to fix the pistons in a position so the cylinder would slide on the
pistons using the studs as a rough guide. Trick
is to secure the pistons in some set position yet leave them free to
squirm a bit as needed. To do that I bought some ¼”
hardwood dowel rod and cut four pieces long enough to reach from the front
of the engine case where the cylinder sets to the rear of that portion,
about 4” best I recall. Length isn’t critical
but you don’t want them in the way. Use the
dowels to hold the pistons in an up position with the
skirts slightly above
the cases. This gives some room to look at the rings during assembly and
get a small tool in to help compress one if needed.
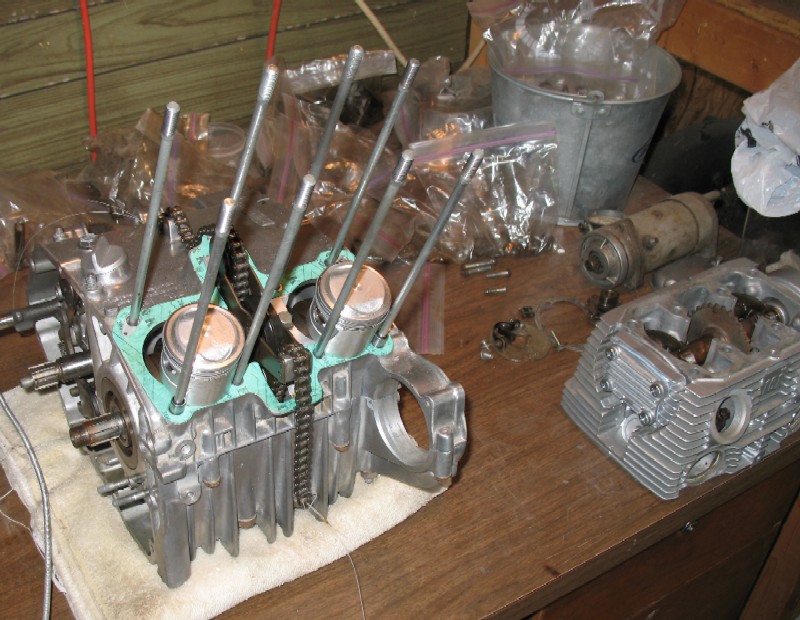
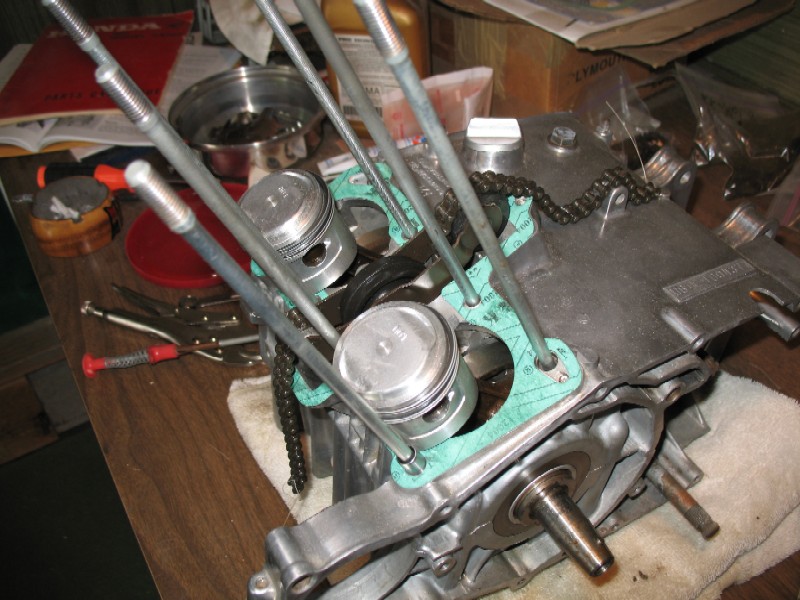
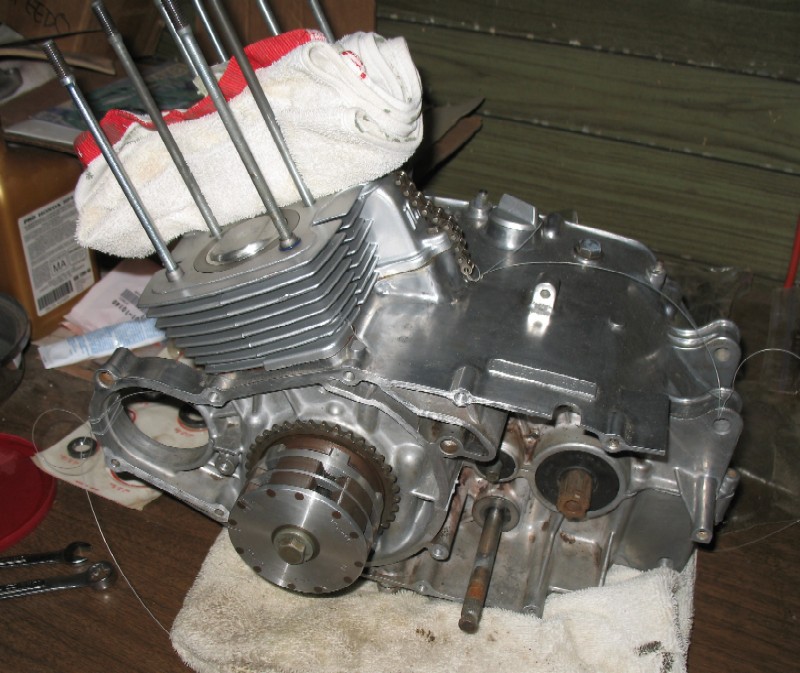
Install the pistons and rings on the rods. Install
the cylinder base gasket. Crank the engine
over to draw the pistons down and put the dowels
across front to back, two for each piston, then
crank the engine over enough to set the piston skirts on the dowels. It
should stay there with no problem. You should
now have two pistons with rings attached standing like little soldiers on
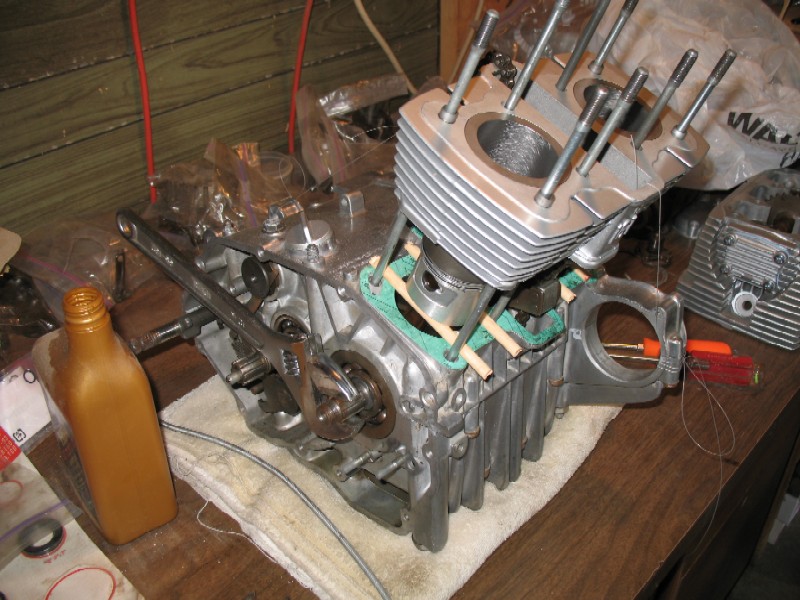
the supporting dowels. Oil the rings and the
bores of the cylinder. Set the cylinder over the pistons and let it rest
on its own weight. Look under the bores and make certain none of the rings
are slipping out of their grooves. Gently, with no down force,
rock the cylinder back and forth as much as the studs will allow it to
move. Check frequently to make sure the rings are staying in position on
the pistons. As you rock the cylinder you’ll
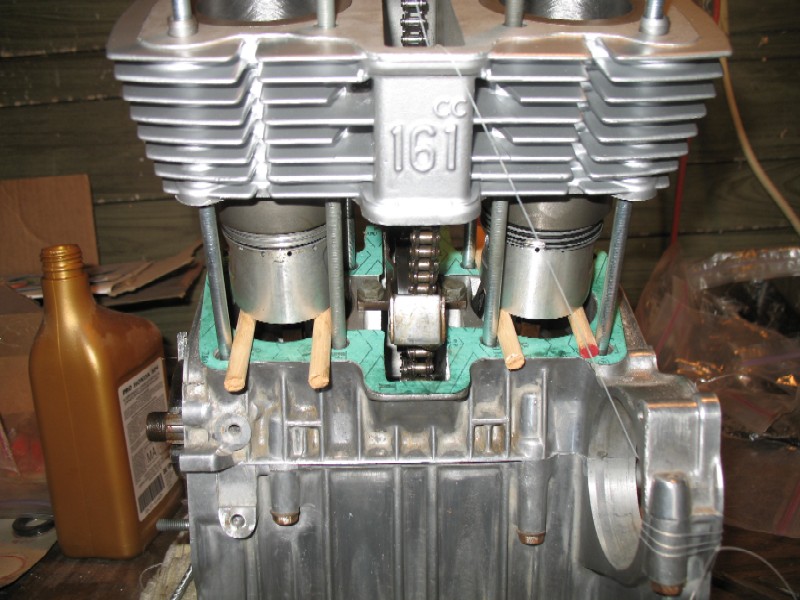
feel it “settle” over each set of rings. Go
easy and slow. The further you get the pistons
into the cylinders the less the whole thing will rock and
you’ll end up with more of a wrist roll than a true fore and aft
rock. At the very end you may have to apply a little downforce to overcome
the drag of the rings now in the cylinder. Go easy and check the last set
of rings often. These are the oil rings and the most brittle of them all.
They are the ones I broke and I’ll bet yours
too. Once the pistons are in the bores pull the
dowels out from under the skirts. Seal the upper
face of the gasket with your favorite goop and
set the cylinder in place.
Thanks again Butch. You rock!
I did snap another oil ring, but that was trying to put it on the piston
with a ring tool. Thumbs worked much better. As for your
instructions, the worked like a champ. Here are the pictures of the
process to go with the text. Hopefully, this will help someone else
out as much as it did me.
At this point I realized that according
to the manual I have, I should have a bunch of other stuff already
installed on the case. Example 1: the dymo sp? thing-a-ma-jig that
has the timing mark. So, after digging through the drawers of my
desk, I found it along with the sprocket and put it on. It seem the
case cover and alternator need to go on also for the marks, so I had to
stop, find them and clean and paint the case cover. I located the
other side and did that one too; figuring I'd need it soon also.
:) For the first time in a long while I am feeling good about this
project. I also managed to strip the rest of the wiring and
components from the frame in preparation for paint. However, the
stupid center stand is ceased on the frame. 4 days of penetrant and it's
still not being nice to me.
[ Back ] [ Next ]
|